|

|
|
| Home | Instruments | Science | Experiments | SiteMap |
EXPGUI top Next page Previous page
EXPGUI, part 2
A.2 Phase Panel
The phase panel is used to edit information about the structural model(s) found in the experiment file. The flags for refining the unit cell and atomic parameters, as well as ther damping values, can be set on this panel. Note that if a single atom is selected using the mouse, the information for that atom can be edited. If a group of atoms is selected (see Mouse Actions) the damping and refinement flags for all the selected atoms are changed.
If the EXPTOOL program (see the installation instructions) is installed, buttons for adding phases and atoms will appear on this panel, as seen below. If the program is not properly installed, no errors occur, but the buttons do not appear.
Note that the order that atoms appear in this panel is determined by the "Sort Atoms by" option in the Options Menu.
The parameter used for sorting is designated with a "*" on the title line above the atoms.
Clicking on this title line rotates through the sorting modes.

A.2.1 Modify Unit Cell Parameters

If the "Edit Cell" button is pressed, the unit cell parameters can be changed, as shown to the right. Note that only the parameters allowed by symmetry can be changed.
A.2.2 Transform Coordinates
If one or more atoms have been selected (see Mouse Actions), it is possible to make changes to those atoms by pressing the "Xform atom(s)" button. This raises the window shown to the right. Note that no changes are actually made, until the "Transform Coordinates", "Set Occupancies",... buttons are pressed.
This window can be used to transform the coordinates coordinates of the selected atoms, globally set occupancy or Uiso (Uequiv) values for the selected atoms, or erase the selected atoms. by pressing the It is also possible to transform the selected atoms from isotropic to anisotropic, or the reverse.
The "Xform Origin 1 to Origin 2" button is only available for those orthorhombic, tetragonal and cubic space groups that are listed in the International Tables with two origin settings. (These space groups have a location in the unit cell that has higher symmetry than a location of a center of symmetry: origin 1 is placed at the highest symmetry location; origin 2 is placed at the computationally reasonable location, the center of symmetry. GSAS only uses the origin 2 settings.) If coordinates have been entered in the origin 1 setting, they may be transformed to the origin 2 setting using this button.
A.2.3 Add Phase
When the "Add Phase" button is pressed, a dialog is created where the space group and unit cell constants can be entered (below).
By using the "Import phase from:" button at the lower right, one can read this information, as well as atomic parameters, from a file. The button to the right of the "Import phase from:" button selects the file format to be used. See the coordinate import discussion for description of available formats. Note that it is relatively easy to add new routines for importing coordinates; see the customization information for more details.
After the "Continue" button is pressed, the spacegroup is checked and the generated symmetry operators are shown. These should be checked carefully, as GSAS will correctly generate a variety of standard and non-standard spacegroups, but it is fussy about spacing: for example "R 3 2" and "R 32" describe different (non-standard) space groups.
The EXPTOOL program is then run and the output is optionally displayed (See Show EXPTOOL output).
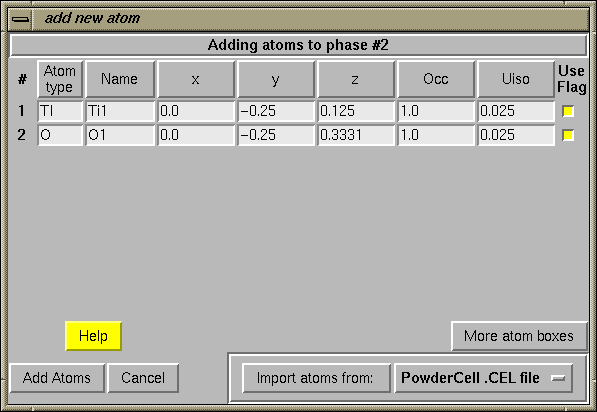
If atom coordinates have been read from a file, along with the cell and space group, the "add new atoms" dialog is then shown, with the atoms displayed (as below.) If the file contains atoms that should not be included in the .EXP file, the "Use Flag" button to the right of each atom can be deselected to prevent the atom from being used.

Atoms will be included in the phase in the order they appear in the table.This order can be changed by pressing the buttons in the top row of the table, which sorts the atoms according to the selected column. Note that if the "Use Flag" button is deselected, the atom appears at the bottom of the table.
When the "Add Atoms" button is pressed, the table is scanned for errors such as invalid numbers or unknown atom types. If an error is encountered, a message is displayed listing the problem(s). Corrections can then be made to the table before pressing the "Add Atoms" button again.
In the case of reading PowderCell .CEL files, the code may have to translate coordinates to shift from an Origin 1 setting to an Origin 2 setting. (GSAS, like many other crystallography programs, assumes that if a center of symmetry is present, it is located at the origin.) If this is done, a message like the one to the left is displayed.
A.2.4 Add Atoms
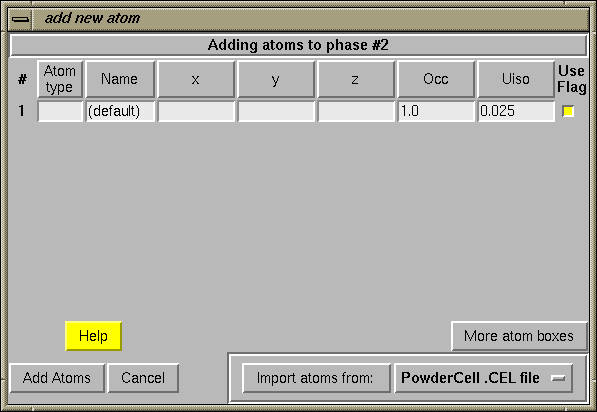
When the "Add New Atoms" button is pressed, a table is generated, as seen below, to enter atoms.
The "Import atoms from:" button can be used to read atoms from a file. The button to the right of the "Import atoms from:" button selects the file format to be used. See the coordinate import discussion for description of available formats and the customization information for more details about adding additional formats. Note that unlike in the Add Phase section, the space group and cell parameters in the imported file are ignored. The "Use" button to the right of each atom can be deselected to prevent the atom from being used.

Atoms will be added to the phase in the order they appear in the table.
This order can be changed by pressing the buttons in the top row of the table, which sorts the atoms according to the selected column. Note that if the "Use Flag" button is deselected, the atom appears at the bottom of the table.
When the "Add Atoms" button is pressed, the table is scanned for errors such as invalid numbers or unknown atom types. If an error is encountered, a message is displayed listing the problem(s). Corrections can then be made to the table before pressing the "Add Atoms" button again.
A.2.5 Replace Phase
The "Replace Phase" is used to change the space group and possibly unit cell for a phase. The input dialog, shown below, shows the current space group and unit cell parameters. By using the "Import phase from:" button at the lower right, one can read this information, as well as atomic parameters, from a file. The button to the right of the "Import phase from:" button selects the file format to be used. See the coordinate import discussion for description of available formats and the customization information for more details about adding additional formats.

Once the "Continue button is pressed, the space group is checked, as is shown in the Add Phase section. A table is then generated for input of atoms, very similar to that in the Add Phase section. If atom coordinates have been read from a file these atoms are included in the table. It should be noted that when a phase is replaced in EXPGUI, all atoms in that phase are erased. If the current atom positions are to be retained, the "Reenter current atoms" box in the initial "Replace phase" dialog should be checked, these atoms will also be included in the table.
Note that no changes are made until after the "Continue" button is pressed on the "Enter Atoms" dialog, so that is is safe to press "Cancel" at any point.
EXPGUI top Next page Previous page Comments, corrections or questions: [email protected]
Last modified 15-December-2005
$Revision: 1.15 $ $Date: 2005/12/16 00:40:23 $