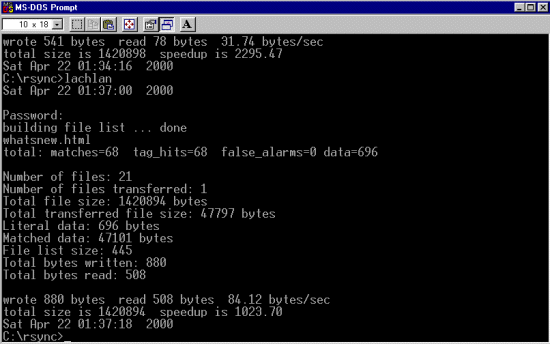
@echo off
REM c:\rsync\rsync -av --delete "\\d/" torte:/rsync/data2/scholten/schizo/d >>c:\rsync\rsync.log
REM netjam --progress --safe-links --dry-run
REM http://optics.ph.unimelb.edu.au/help/rsync/#install
REM http://www.ccp14.ac.uk/ccp14admin/rsync/index.html --exclude "*.gif" --exclude "*.jpg"
set CYGWIN=tty binmode
set TERM=ansi
REM set RSYNC_PASSWORD=plaintextpassword
REM >>c:\rsync\rsync.log
set RSYNC_RSH=c:\rsync\ssh.exe
REM echo Drive D >>c:\rsync\rsync.log
c:\rsync\gnudate
REM Books test
REM c:\rsync\rsync -rlpt -vv --exclude "*.pfe" --delete --stats -e ssh -z "\\d/lachlan/web/books/" [email protected]_server.ac.uk::joe_blogs_web/books/
REM root area HTML changes (what's new). Currently running
c:\rsync\rsync -rlpt -vv --exclude "*.pfe" --include "*.html" --include "*.htm" --exclude "*.gif" --exclude "*.jpg" --exclude "**" --stats -e ssh -z "\\d/lachlan/web/" [email protected]_server.ac.uk::joe_blogs_web/
REM Images test
REM c:\rsync\rsync -rlpt -vv --exclude "*.pfe" --include "*.html" --include "*.htm" --include "*.gif" --include "*.jpg" --exclude "**" --stats -e ssh -z "\\d/lachlan/web/images/" [email protected]_server.ac.uk::joe_blogs_web/images/
REM c:\rsync\rsync -rlpt -vv --exclude "*.pfe" --include "*.html" --include "*.htm" --include "*.gif" --include "*.jpg" --exclude "**" --stats -e ssh -z "\\d/lachlan/web/" [email protected]_server.ac.uk::joe_blogs_web/
REM Complete update
REM c:\rsync\rsync -rlpt -vv --exclude "*.pfe" --stats -e ssh -z "\\d/lachlan/web/" [email protected]_server.ac.uk::joe_blogs_web/
REM Root area and tutorial area
REM c:\rsync\rsync -rlpt -vv --exclude "*.pfe" --include "*.html" --include "*.htm" --include "*.gif" --include "*.jpg" --include "/tutorial/" --include "/tutorial/**" --exclude "**" --stats -e ssh -z "\\c/lachlan/ccp14/web_live/" [email protected]_server.ac.uk::joe_blogs_web/
REM Root area and tutorial directory and no subdirectories
REM c:\rsync\rsync -rlpt -vv --exclude "*.pfe" --include "*.html" --include "*.htm" --include "*.gif" --include "*.jpg" --include "/tutorial/" --exclude "**" --stats -e ssh -z "\\c/lachlan/ccp14/web_live/" [email protected]_server.ac.uk::joe_blogs_web/
REM ccp14admin security area + rsync + ccp14admin index page
REM c:\rsync\rsync -rlpt -vv --exclude "*.pfe" --include "*.txt" --include "*.zip" --include "*gz" --include "*Z" --include "*.html" --include "*.htm" --include "*.gif" --include "*.jpg" --include "/rsync/" --include "/rsync/**" --include "/security/" --include "/security/**" --exclude "**" --stats -z "\\c/lachlan/ccp14/web_live/ccp14admin/" [email protected]_server.ac.uk::joe_blogs_web/ccp14admin/
c:\rsync\gnudate
